Behind Shower Tile: The Layers and Decisions That Matter
See a shower wall layer illustration, real tile progress photos, and practical questions about waterproofing, niches, layout, and shower tile installation in Queens.
By LOKEIL Renovation. Updated .
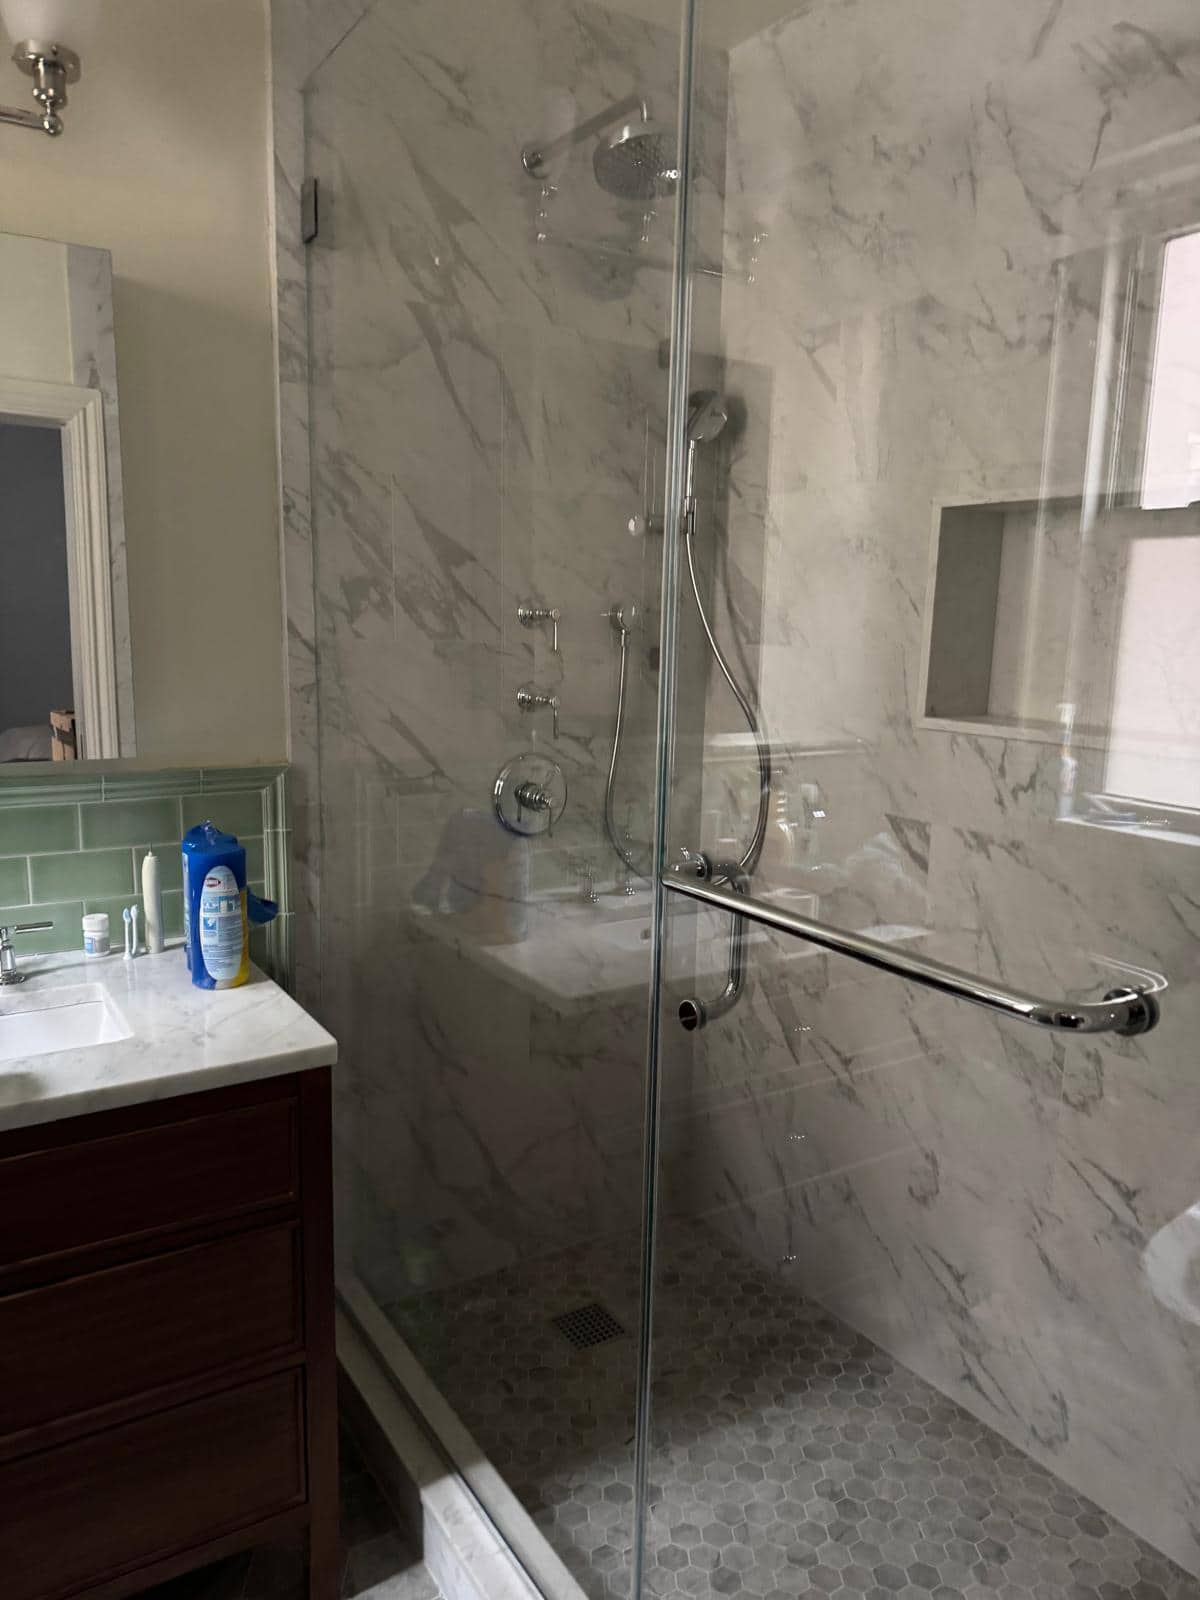
Glass makes this shower easy to see. The pale tile, niche, corners, and floor edges become part of one uninterrupted view. The waterproofing is concealed, however, so this finished photograph cannot tell you which assembly is behind the tile.
When planning shower tile installation in Queens, ask about both the finished layout and the wall and base system. A good reference photo explains the look you want. A written assembly scope explains the work the finish will cover.
Read the wall from the structure to the tile
The illustration shows one general bonded sheet membrane wall concept. It separates the visible tile from the support and water protection beneath it. Other systems use applied coatings or integrated waterproof boards, with their own requirements.
Schluter describes bonded waterproofing as a membrane connected to suitable backing and a compatible shower base and drain. The wall illustration alone does not show that complete water management system. Ask for the specified products and their installation instructions, rather than combining layers from unrelated methods.
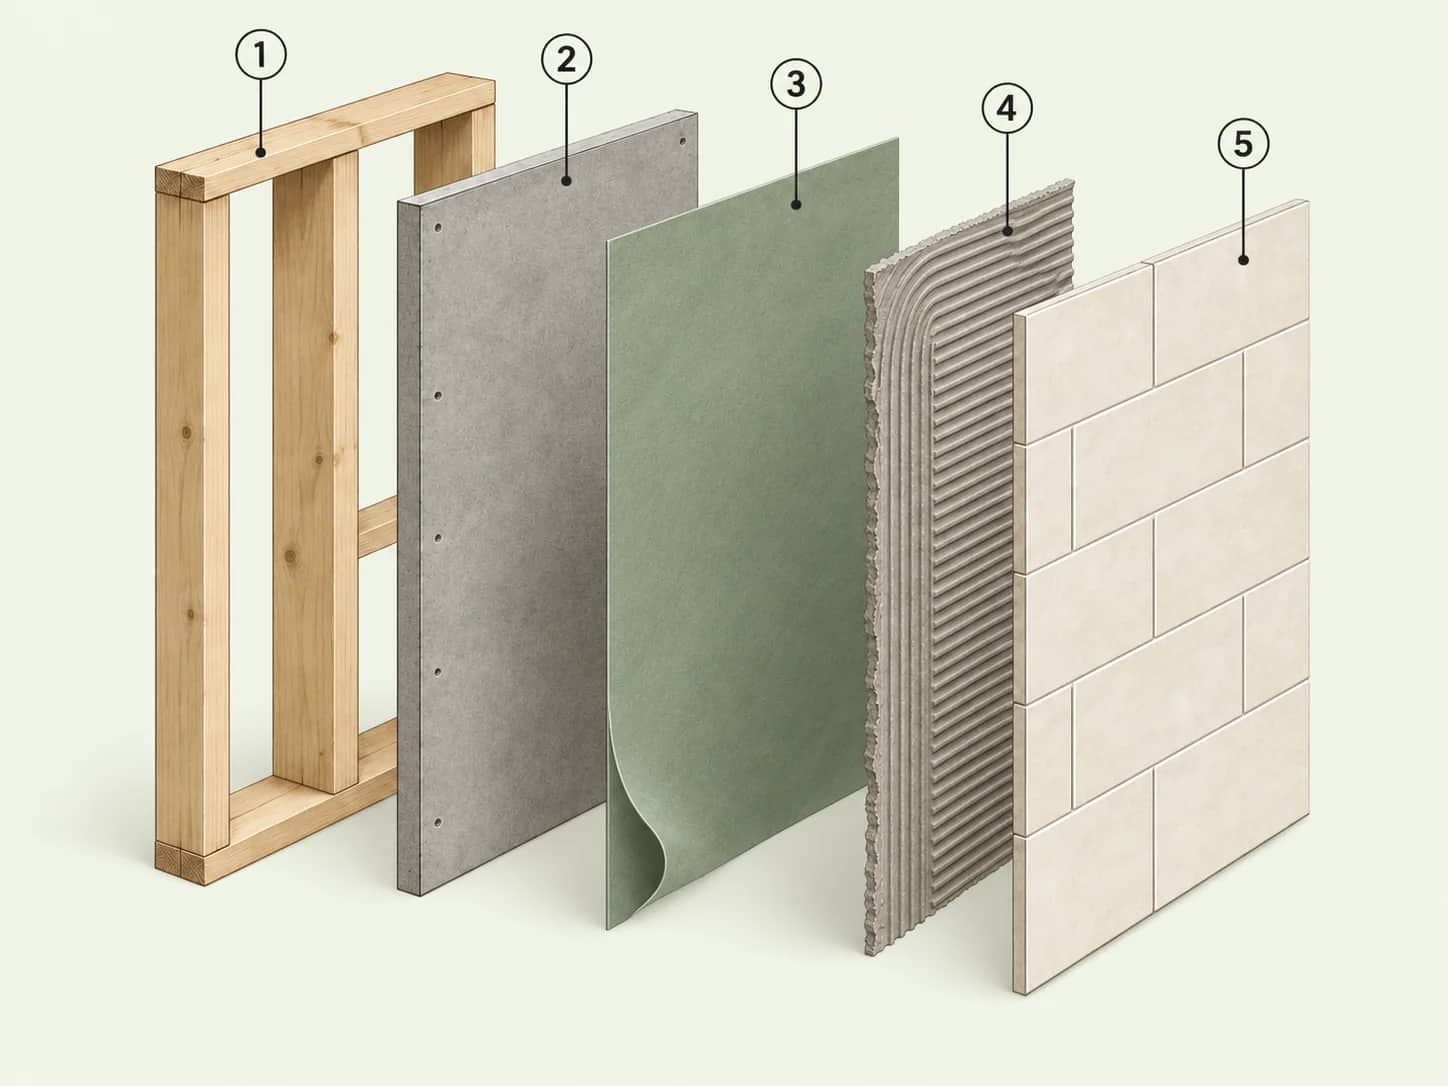
- Framing. Supports the wall and any planned niche or fixture blocking.
- Suitable backing. Provides a stable surface compatible with the specified shower system.
- Bonded sheet membrane. Protects the backing when connected and detailed as the complete system requires.
- Setting mortar. Bonds the tile to the prepared assembly using a compatible material.
- Tile finish. Creates the visible surface. Tile and grout alone are not the shower waterproofing plan.
The open niche is the moment to ask questions
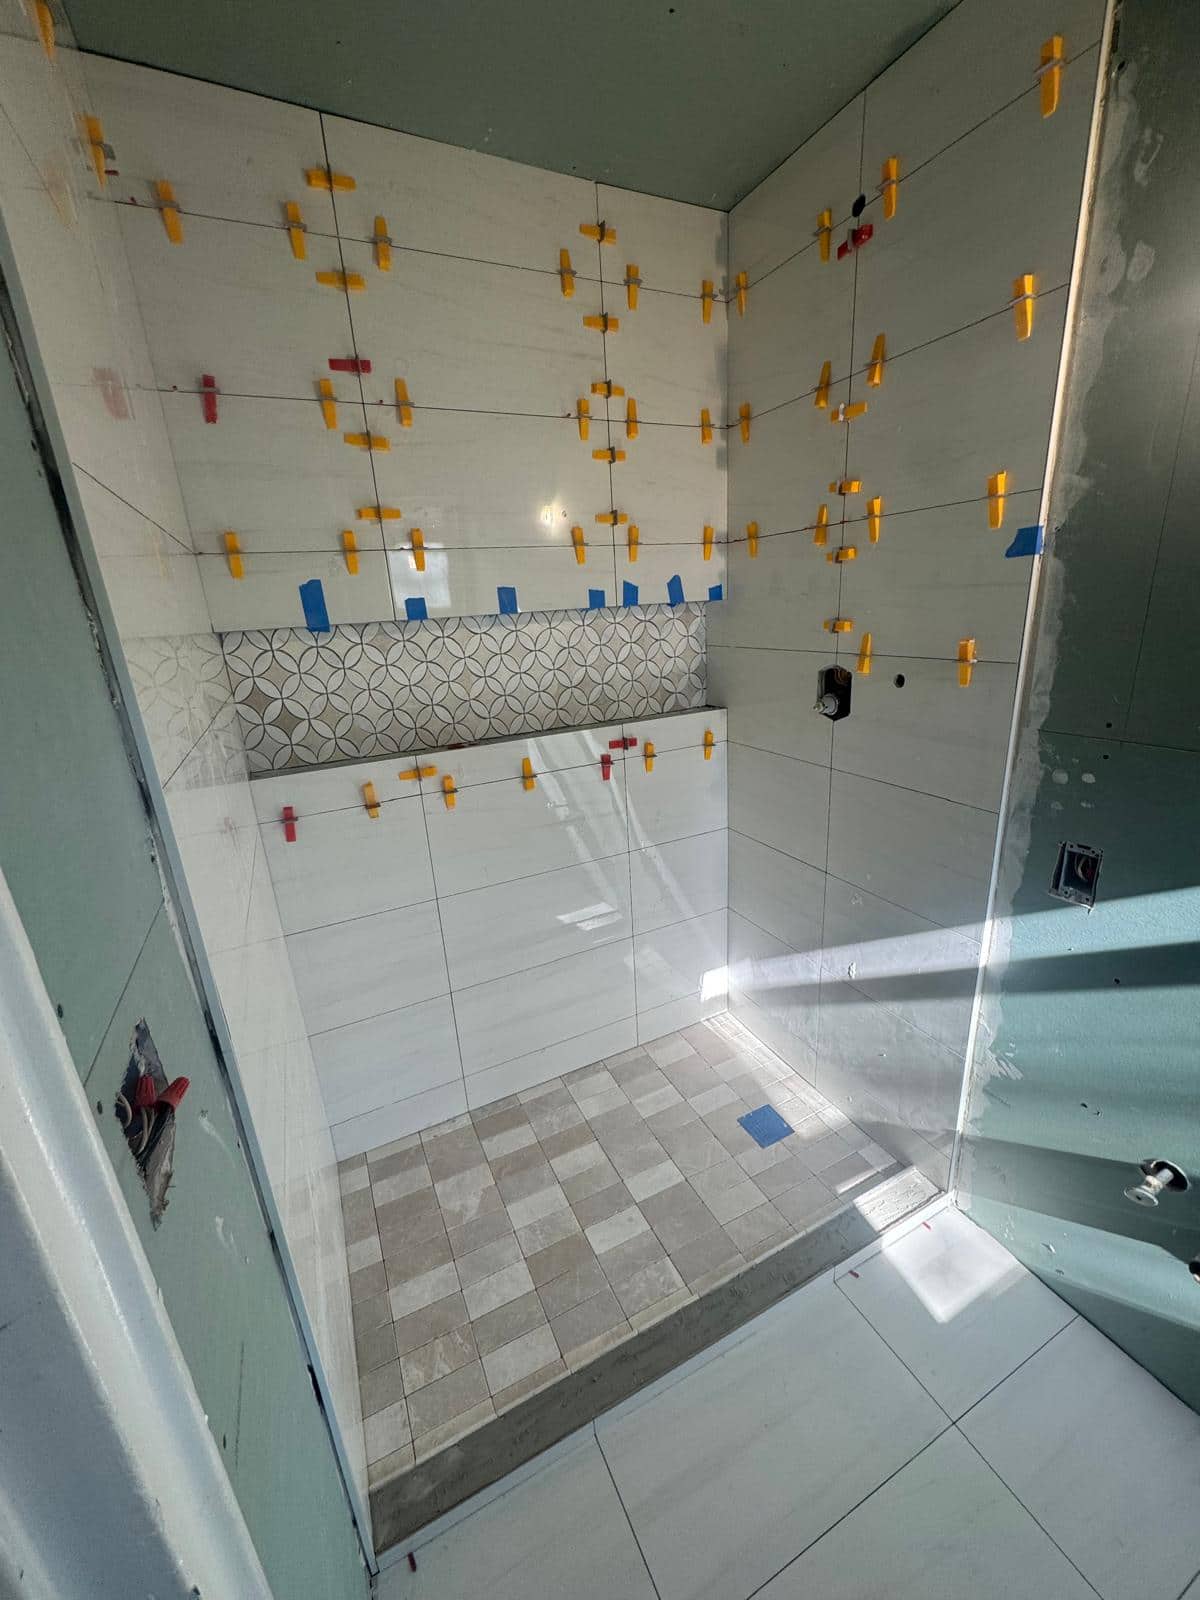
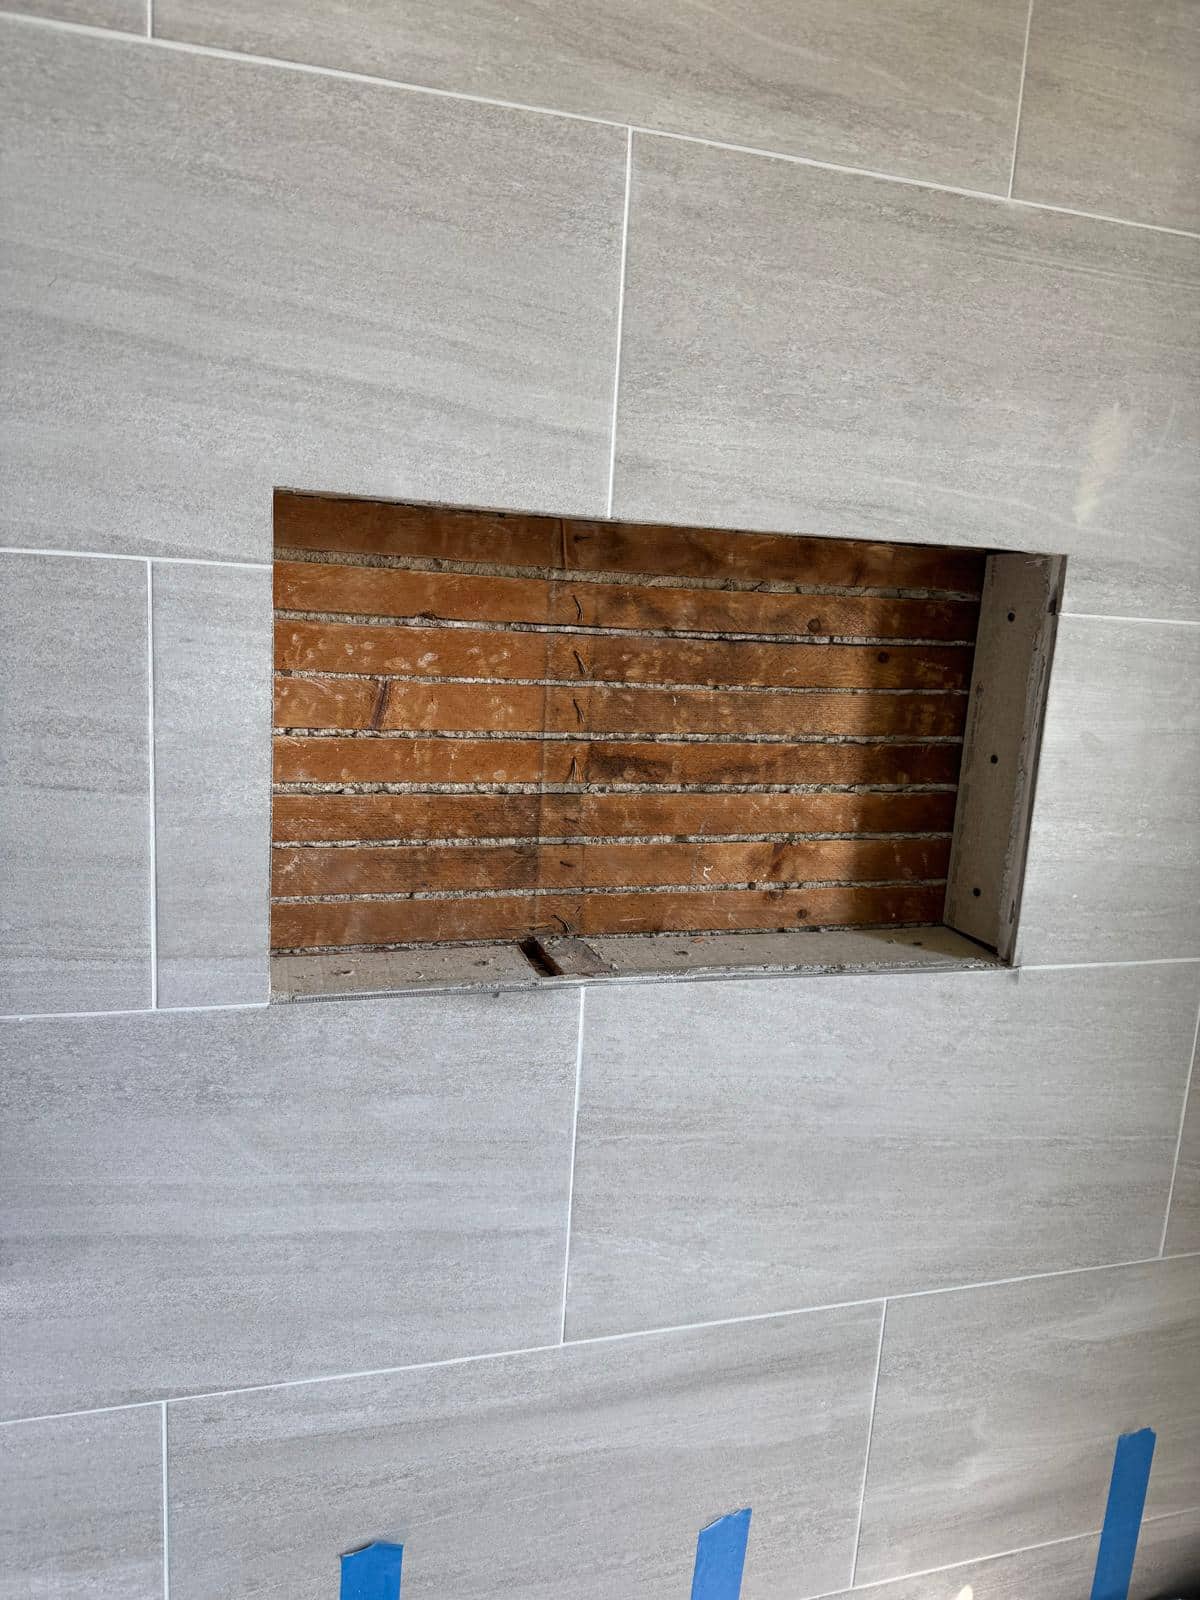
This real progress photo shows the niche interior still open while surrounding gray tile is in place. It makes a useful question visible: how will the opening connect to the wet area assembly before its finish covers the detail? The photograph does not establish the specified waterproofing product or installation sequence.
Choose niche position around reach and the bottles you use. Discuss the sill, corners, tile thickness, and edge treatment together. Ask how water will shed back into the shower and how the opening will be protected according to the chosen system.
Let the full wall decide the first tile
A tile sample cannot show the cuts at the ceiling, the shower opening, the niche, and the controls. Review the full wall layout before setting starts. A small shift in the starting line can replace a narrow edge piece with a more balanced cut.
Bring the glass and fixture plan into that conversation. The tile will define the finished opening, and the glass will expose its edges. Confirm which measurements must wait until the finished surfaces are ready.
- Check where full tiles and cut pieces land around the niche.
- Confirm the outside edge profile and corner treatment.
- Look at floor tile size together with the drain and planned slope.
Keep a record before the details disappear
Ask for the product information and progress photos at the agreed stages before tile conceals the wall and base work. Photos can document what was visible at a particular stage; they do not replace required checks or prove the entire installation by themselves.
At the final walkthrough, look at the grout, flexible joints, trim, niche edges, glass, and fixture fit. Ask when the selected products allow the shower to be used and how to clean them. Follow the actual product and installer guidance rather than a universal waiting time.
Common questions
What layers are behind shower tile?
One bonded membrane wall concept uses structural support, suitable backing, a waterproof membrane, compatible setting mortar, and tile. Other shower systems differ. The wall, base, drain, joints, and openings must be detailed as a compatible complete assembly.
Are shower tile and grout enough to waterproof the wall?
No. Do not use the visible tile and grout as the waterproofing plan. Ask which suitable backing and water management system will be installed and how corners, niches, penetrations, and the shower base will connect.
Can a finished shower photo prove waterproofing was done correctly?
No. A finished photo shows visible surfaces and layout. Product specifications, appropriate installation checks, and records from the concealed stages are needed to assess the work behind the tile.