Bathroom Tile in Queens: Set the Layout Before Work
Plan bathroom tile cuts, niche alignment, grout, and exposed edges with a layout review before tile installation begins in your Queens home.
By LOKEIL Renovation. Updated .
The tile in a box is only part of what you are choosing. Once it reaches the wall, its size sets the grout grid, the pieces at corners, and the cuts around a niche. The same tile can give a room a different rhythm depending on where that grid begins.
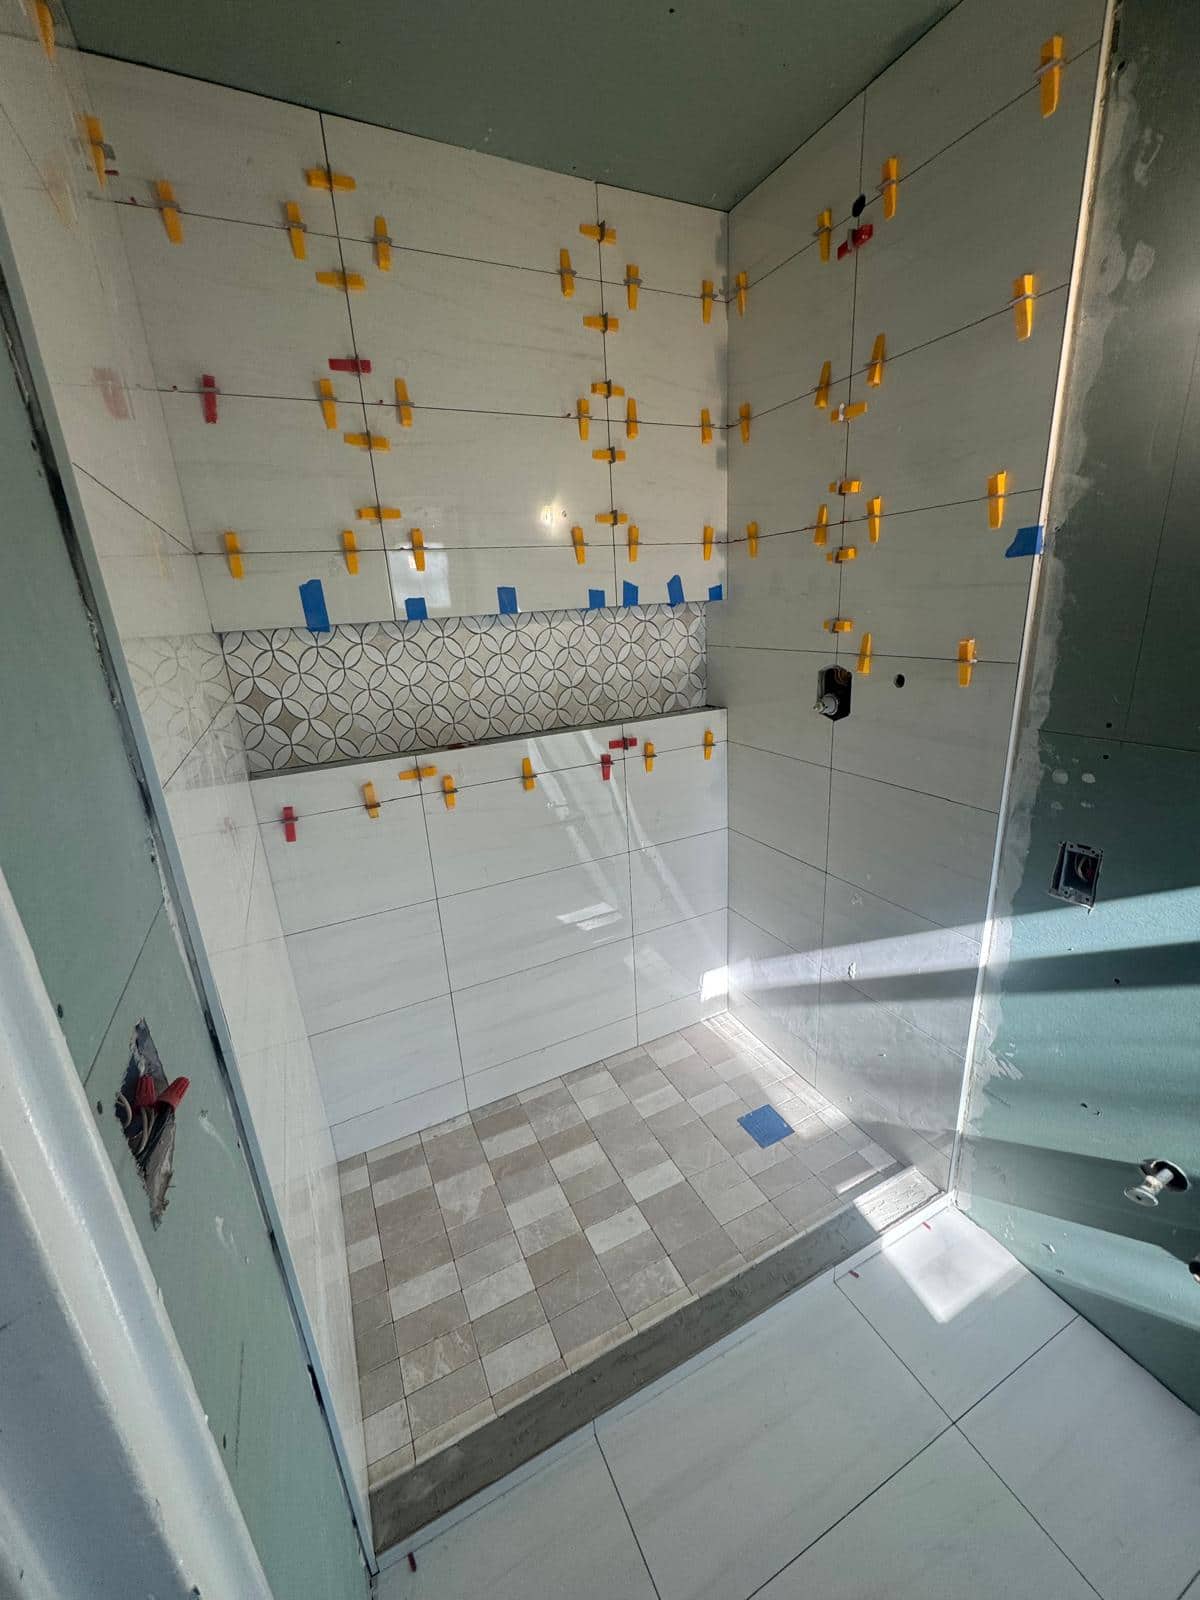
The LOKEIL progress photo above brings three scales together: broad wall tiles, a narrow decorative band, and a small mosaic floor. Use it to think about the layout you want reviewed before bathroom tile installation begins.
Choose the view you want to organize
Stand at the bathroom doorway and notice the first wall you see. Then look at the wall you face in the shower. Ask the installer to show how the proposed tile grid lands on those surfaces, including the pieces at both ends.
Centering a pattern on one wall may change the cuts on another. Decide which view matters most, then review that tradeoff on a measured layout. A reference photo cannot settle it without the actual room dimensions.
Give the niche its own drawing
In this photo, a decorative band crosses the niche area. That relationship needs planning: the niche opening, surrounding joints, inside surfaces, and exposed edges all meet in a small space.
Ask to see the niche position against the tile grid before the wall is closed and tiled. If a shelf or trim profile is planned, include it in that review. Moving the niche or changing the tile size later can change the arrangement.
Review the edge and grout with the actual sample
A tile face does not show how its edge will look beside paint, at a doorway, or around a recess. Put the tile sample next to the proposed trim or edge treatment. Ask which exposed edges the estimate includes.
Look at a grout sample with the tile under the room lighting. A close color match can soften the grid; a stronger contrast makes the joints more visible. Neither choice removes the need to agree on the joint layout and the product instructions.
- Doorway and wall ends: where does the tile stop?
- Niche and shelf edges: what finish will be visible?
- Corners and changes of surface: what detail is proposed?
- Tile and grout samples: do you like them together in the actual light?
Approve the appearance and the preparation separately
A beautiful layout does not tell you what is behind it. Ask for the backing, waterproofing, and preparation scope as well as the visible tile plan. Keep those decisions clear when comparing quotes.
For your LOKEIL inquiry, include the tile link or sample photo, the pattern you like, the surfaces being tiled, and any niche or bench ideas. Ask for a layout review before the tile is installed.
Common questions
Should a shower niche line up with the tile joints?
It is a design decision to review before construction and tiling. The niche position, tile size, joints, and edge treatment affect each other. Ask for a measured layout that shows the opening and the cuts around it.