City Island · The Bronx
Where a City Island Bathroom Finish Job Ends
Define a City Island bathroom finish scope around walls, ceiling, tile edges and fittings, with responsibilities for connected work and completion.
3 min read · Updated · By LOKEIL Renovation
Plan a similar project →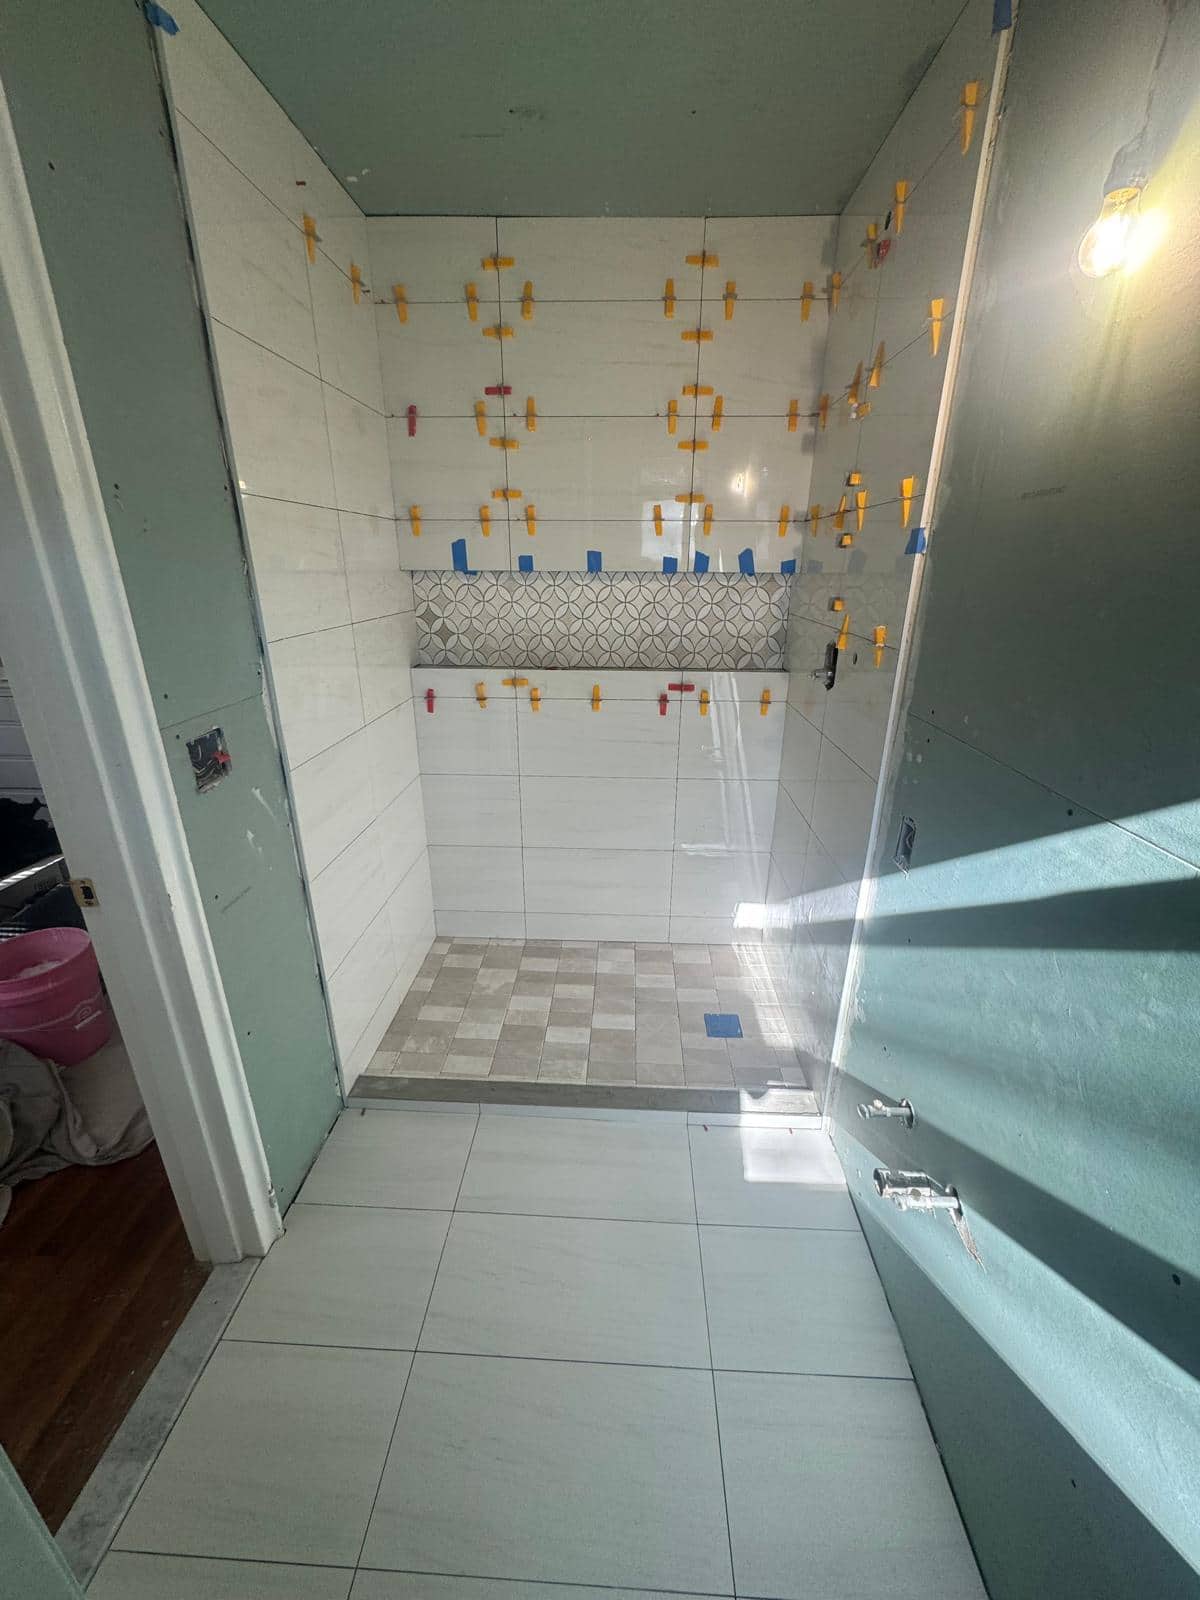
“Finish the bathroom” can mean different work to different people. One person may picture painted walls; another may include the tile edges, ceiling, fitting trim and final cleanup. Settle that difference before comparing estimates.
In this LOKEIL photograph, a patterned shower recess sits within pale tiled walls. Clips remain in place, and green wallboard, fitting openings and a temporary bulb are visible around the tiled area. For a City Island home, the useful lesson is to name the surfaces and connections that must be included before the room reaches the finish you expect.
A focused finish scope still needs an agreed boundary and a complete result.
Draw the boundary around the result you want
Walk through the room view with the person preparing the estimate. Start at the tiled shower, move onto the adjoining wall and continue to the ceiling and doorway. Say which surfaces should stay and which need assessment, repair, preparation or a new finish.
Use the visible conditions to describe the result, then ask how it will be achieved. For an unfinished painted surface, identify the area and finish expectation. For a tile edge, say which adjoining surface must be completed with it. For an open fitting position, identify the intended fixture and responsible trade.
The exposed board in this image does not identify its product, establish suitability or reveal the concealed assembly. If a condition requires further assessment, keep that decision open until the responsible professional can inspect it. A cosmetic finish request should not decide unresolved wet area or service work by assumption.
Put retained surfaces and new work on the same room view. A boundary is easier to understand when both sides are named. This also helps distinguish a focused wall finish from a wider bathroom renovation.
| Connection | What the scope should name |
|---|---|
| Tile beside painted wall | Retained tile, assessed adjoining surface, preparation and the intended finished edge. |
| Wall meeting ceiling | Extent of each finish and whether the ceiling is included. |
| Opening for a fitting | Selected fixture, responsible trade and surrounding finish responsibility. |
A closer look
Name both sides of every finish connection
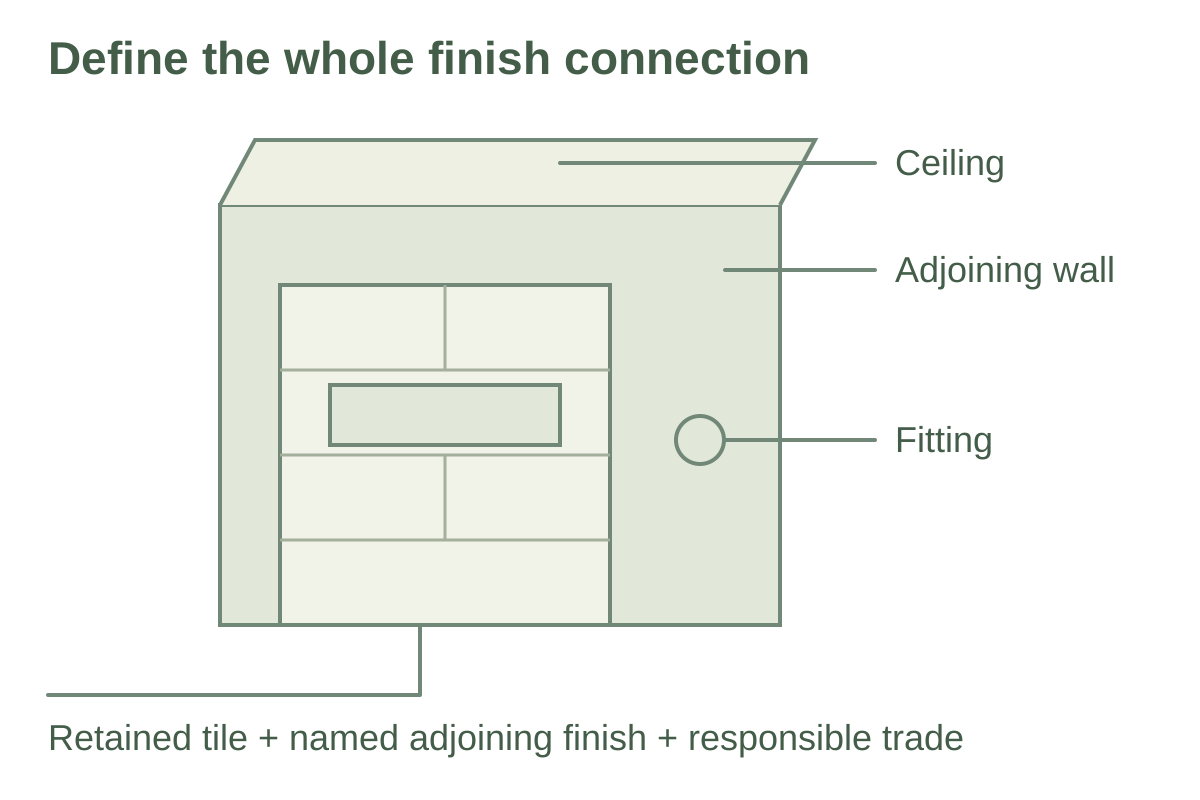
- Name the retained surfaces and the finish needed beside them.
- Assign responsibility for every connected surface and fitting.
- Review the complete agreed result and any unresolved items.
Write down what counts as finished
Ask for the identified surfaces, materials and responsibilities to appear in the work description. NYC DCWP’s June 2026 checklist calls for the work and materials to be described and for expected start and substantial completion dates, with relevant contingencies, to be included in the contract. Use that guidance to ask concrete questions about your actual scope.
Its completion guidance also says work in the contract must be completed before a completion certificate is requested. That is why “the walls are painted” may be an incomplete description of the result if your agreed work also includes ceiling finishing, trim or connected fixtures.
In an occupied home, connect the finishing arrangement to the room you still need to use. Discuss access for the relevant trades and which functions will be unavailable. Agree who confirms readiness for use; a clear photograph and an attractive tile field cannot establish that on their own.
For your City Island request, send one complete room view and closer views of the edges you want addressed. State the intended result and what must remain. LOKEIL can discuss a focused finish scope from that record, with any unresolved condition or wider room work identified before the scope is settled.
Choose a starting point
Keep the tile and finish the adjoining room surfaces
Assess the wall and ceiling conditions and name how the retained finishes meet new work.
A connected condition needs wider work
Have the responsible professional assess it before fixing the scope or promising a finish result.
Your room, your next step
Define a City Island bathroom finish scope
Prepare a short brief, then open it in your email app. Add room photos and any building requirements before sending to LOKEIL.
Preview your email brief
Hello LOKEIL, Project neighborhood: City Island, The Bronx I am a: Homeowner Building type: Apartment / condo / co-op Work I am considering: Retained tile and fixtures, assessed adjoining wall and ceiling surfaces, intended finish and edge treatment, responsible trades for fitting openings, occupied room access and complete scope review Timing: Exploring the scope Best number to reach me: Room conditions / building access / questions: I can attach current room photos, approximate measurements, and building requirements before sending. Article I read: https://lokeilremodeling.com/blog/a-colorful-mosaic-niche-in-a-white-shower
This prepares an email draft. LOKEIL receives your brief only when you send it. Prefer webmail? Copy the preview and email info@lokeilremodeling.com.